Badge #12: Gen Wun
You should consider picking up some strong fighting or fire types before you return to Ametrine Mountain. Once you're ready, exit out to Route 3 from Calcenon and go back into the mountain; there's a surf spot to the immediate north of the ice you find across the river. Go into it, then press A in the dark patch to dive. Take a minute to appreciate the best music in the game, then go to the left and press A in the light patch to surface. (Congrats, you now how to dive.)
Keep going down to the south and dive again to find a small cave entry. Surface in the next room to find PULSE Avalugg, which is the cause of the massive ice wall.
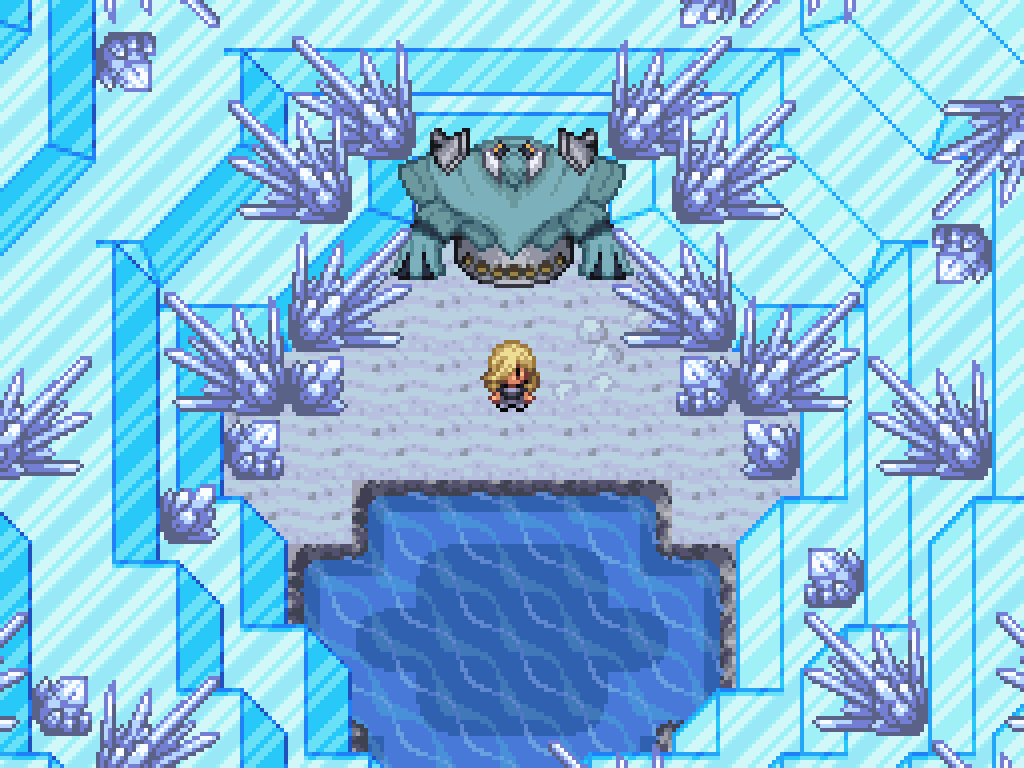
Activate the PULSE machine and select the option to fight it. This is actually a much harder fight than it seems on the surface as the field effect heavily nullifies fire type attacks and PULSE Avalugg has 105/255/255 bulk. Try melting the field with Heat Wave (or similar moves) to nullify Earthquake, or just throw a bunch of Fighting types at it.
Pokemon Redoubt
| Sprite | Name | Level | Ability | Held Item | Moves | EVs |
|---|---|---|---|---|---|---|
 |
Avalugg-PULSE | 70 | Solid Rock | Leftovers |
|
0/252/0/0/0/252 |
As soon as you beat it, you'll get a small cutscene with Shelly. Use the light shard above to heal your team, and then go straight up to get to Ametrine Mountain 3F. Walk to the right and then up the stairs to find an ice puzzle.
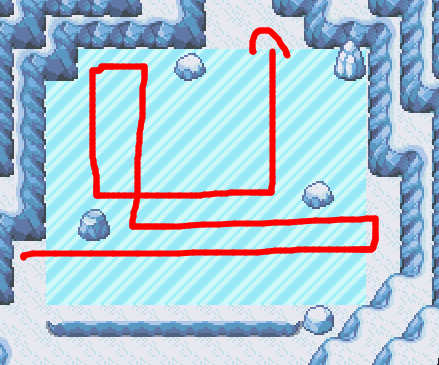
This one looks worse than it is. Go up the ladder to find another ice puzzle.
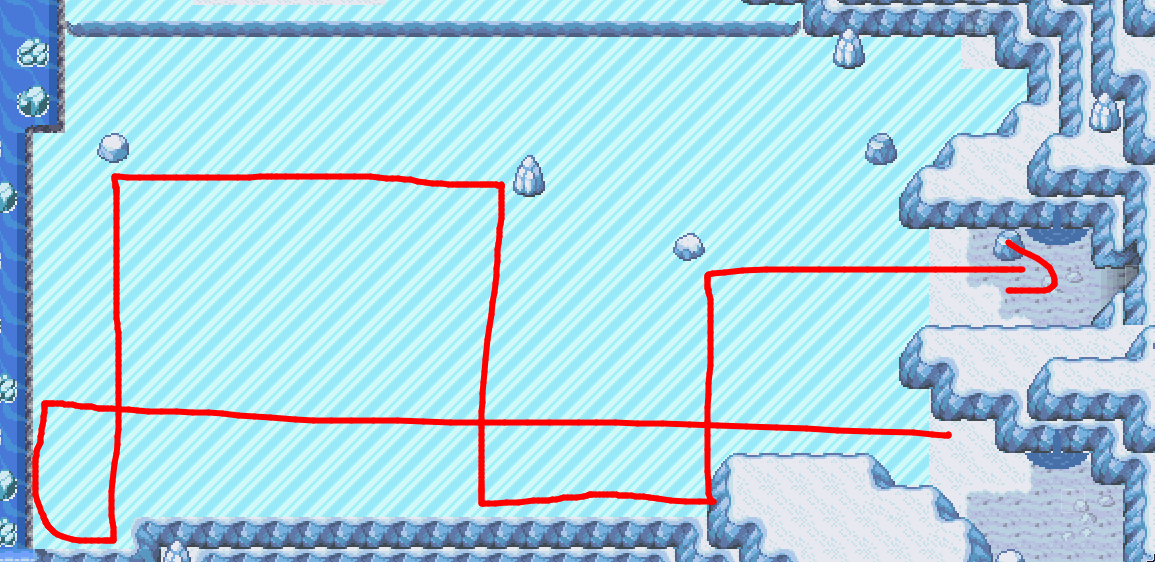
Exit out to the right to enter Ametrine City. Talk to Shelly in the town proper for a brief cutscene; you need to look for Heather. Before doing that, there's a few things you can find here. The open apartment building at the northwest of the town has a kid in it that asks you for a Pidove in exchange for an Old Amber. If you go down to the lower part of town and find the Pokécentre, next to it is a house with a single NPC. Talk to them and battle all of the Pokémon in the PC to get another Department Store sticker (and the most important one, allowing you access to the evolution stones!)
In addition, if you caught a Rotom before, directly below the two left-most apartment buildings is a house with a PC where you can change Rotom forms.
To advance the plot some more, find the creepy house in the main area of town. Talk to the child directly in front of it, then walk inside for some backstory for a major story character (no props for figuring out who it is). Go outside and talk to the kid Shelly is interrogating to find out the blue-haired soy guy you saw is called Blake, and he's probably evil. Go up to the now freshly-opened apartment building and talk to Shelly to get a long cutscene.
Ametrine Fight
This is a dumb puzzle with some interlocking parts, but luckily I figured it all out for you.
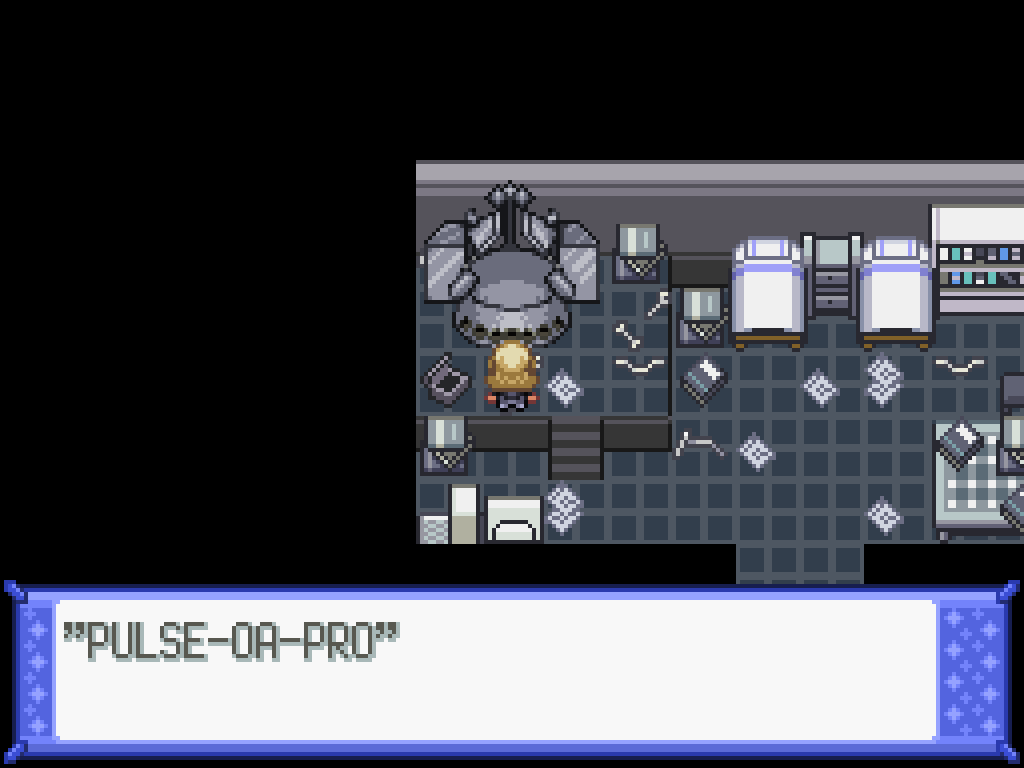
FULL Apartment Puzzle Walkthrough

Activate the console to get the Program Disc.

Activate the rubbish bin to get the head of a key.
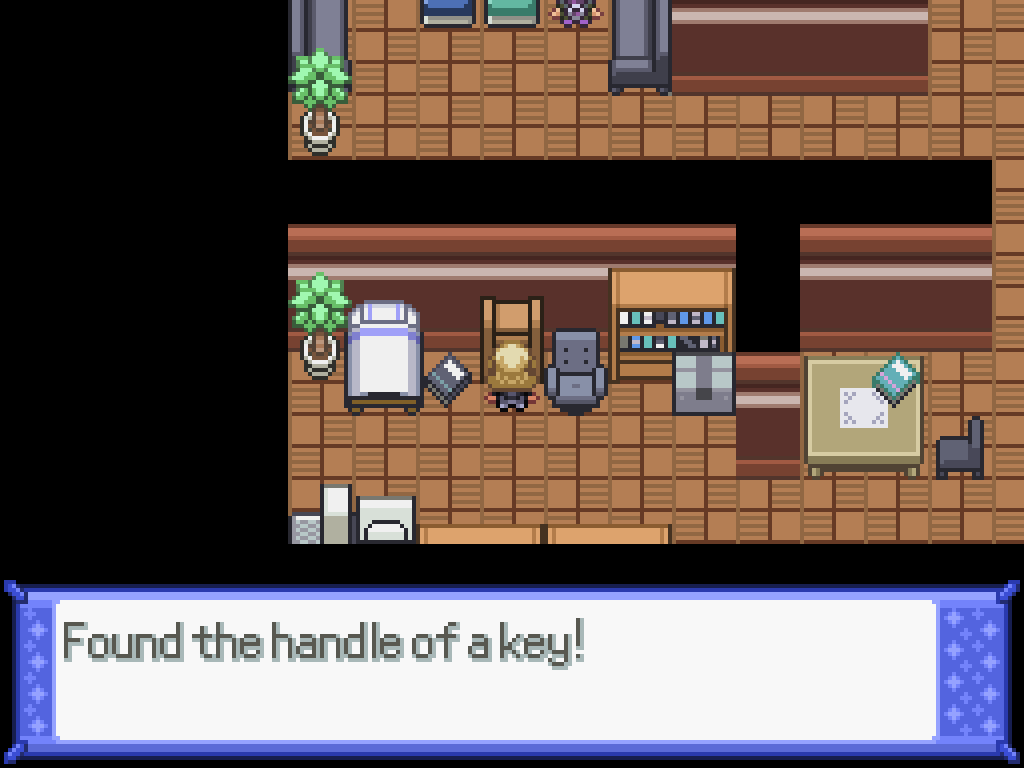
Activate the drawers to get the shaft of a key. This gets you the full key. (You can do these steps in either order.)

Activate the cupboard to unlock it and get the Power Cable.
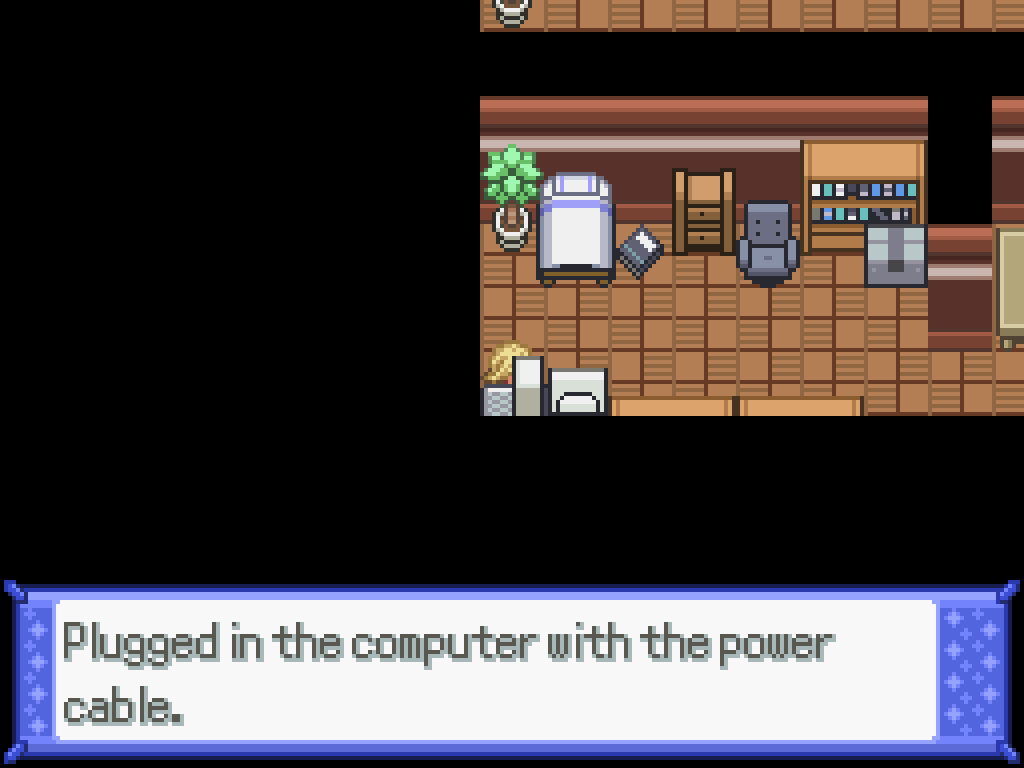
Activate the computer twice to power it on, and insert the Program Disc. Finally, you can enter the code 5083164 when activating the monitor to open the secret door.
After solving the puzzle, this spits you out in Ametrine Mountain again. Follow the (linear) path and talk to Shelly for a long cutscene. There's a Flying Gem in the conspicious rock to the north east, and also the Flying Memory inside a chest inside the now-empty shed. Next, you need to walk all the way back down and to the far left of the city into the area previously blocked off by an NPC. There's a few double battles up on this path (six, I think) with Cal for the first half and Shelly for the latter half.
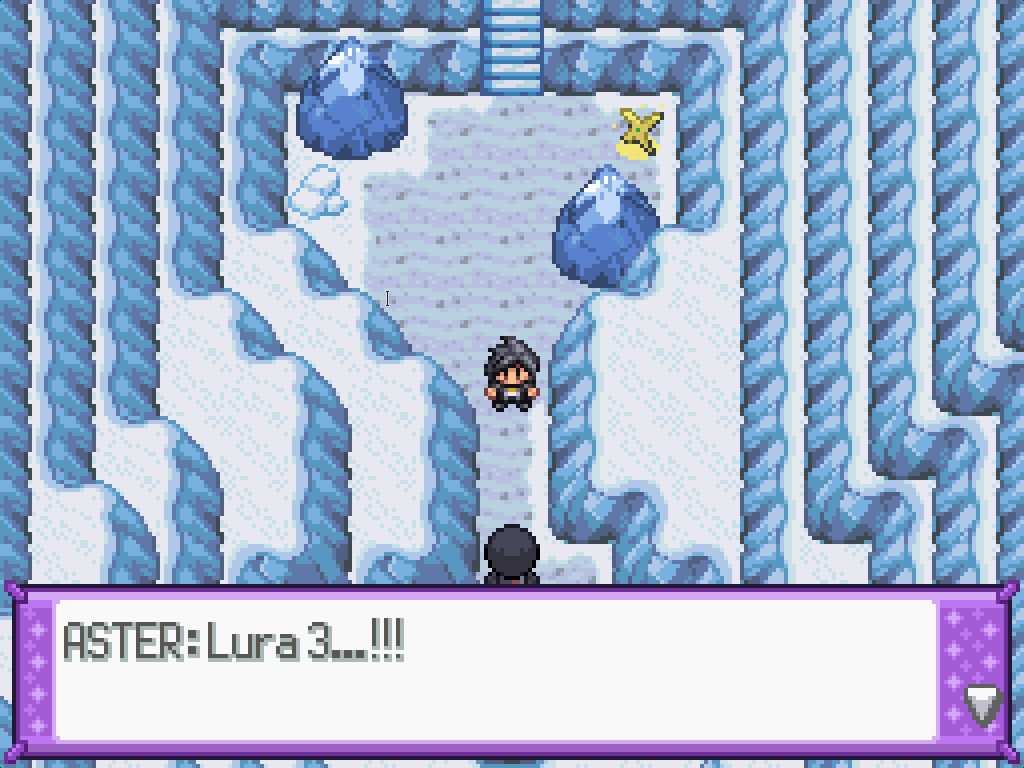
After fighting your way back into the mountain, you will be greeted by Aster. (Well, this is only true if you did NOT give Blake the ring. If you did, he won't be there.) I... kinda don't care about rebalancing his team, so enjoy an easy fight to break up the monotony.
Meteor Private Aster
| Sprite | Name | Level | Ability | Held Item | Moves | EVs |
|---|---|---|---|---|---|---|
 |
Solrock | 68 | Levitate | Light Clay |
|
0 / 0 / 0 / 0 / 0 / 0 |
 |
Golurk | 68 | No Guard | -- |
|
0 / 0 / 0 / 0 / 0 / 0 |
 |
Krookodile | 69 | Intimidate | Muscle Band |
|
0 / 0 / 0 / 0 / 0 / 0 |
 |
Passimian | 69 | Defiant | Life Orb |
|
0/4/252/252/0/0 |
 |
Lycanroc | 70 | Sand Rush | Life Orb |
|
0/4/252/252/0/0 |
|
|
Lycanroc-Midnight | 73 | No Guard | Elemental Seed |
|
0/4/252/252/0/0 |
Proceed up the mountain to find Blake at the top. If you walk into the tile next to Shelly, it'll trigger a battle with him, and a hard one too. Some tips:
- This is a solid contender for one of the least fair fights in the entire game. He has a stupidly advantageous field, an advantageous forced weather effect, and it's a double battle.
- Hail means that the field effect will be put back down if you remove it, so don't even waste your time.
- Get a strong electric type to counter his Gyrados and Walrein, who are otherwise neutral or resist both Ice counters. Something like Lanturn, which is very easily available and learns Tail Glow via level up.
- Otherwise, just throw strong fighting or fire types at him until you win.
Agent Blake
| Sprite | Name | Level | Ability | Held Item | Moves | EVs |
|---|---|---|---|---|---|---|
 |
Gyarados | 75 | Intimidate | -- |
|
0 / 0 / 0 / 0 / 0 / 0 |
 |
Weavile | 75 | Pickpocket | -- |
|
0/4/252/252/0/0 |
 |
Starmie | 75 | Natural Cure | Icy Rock |
|
0 / 0 / 0 / 0 / 0 / 0 |
 |
Walrein | 75 | Ice Body | Leftovers |
|
0/252/0/0/0/4 |
 |
Sandslash-Alola | 75 | Slush Rush | -- |
|
0/4/252/252/0/0 |
 |
Darmanitan-Galar | 75 | Zen Mode | -- |
|
0/4/252/252/0/0 |
After a small cutscene, you find out that Terra is the inside agent all along (oh no!). Accept Cal's offer to take you down as there's really nothing here to see. There's a few things here to do after that; if you go into the house below Blake's apartment you can trade a Floral Charm for the Banetteite X, which might be useful in two gyms time. You can also get another starter Pokémon and another sticker here! You can also get a Riolu egg here; first, talk to the Old Man inside the house directly to the right of the apartment. Walk towards the left of the town and you'll see one on a roof; walk past it and it'll run off to the right.
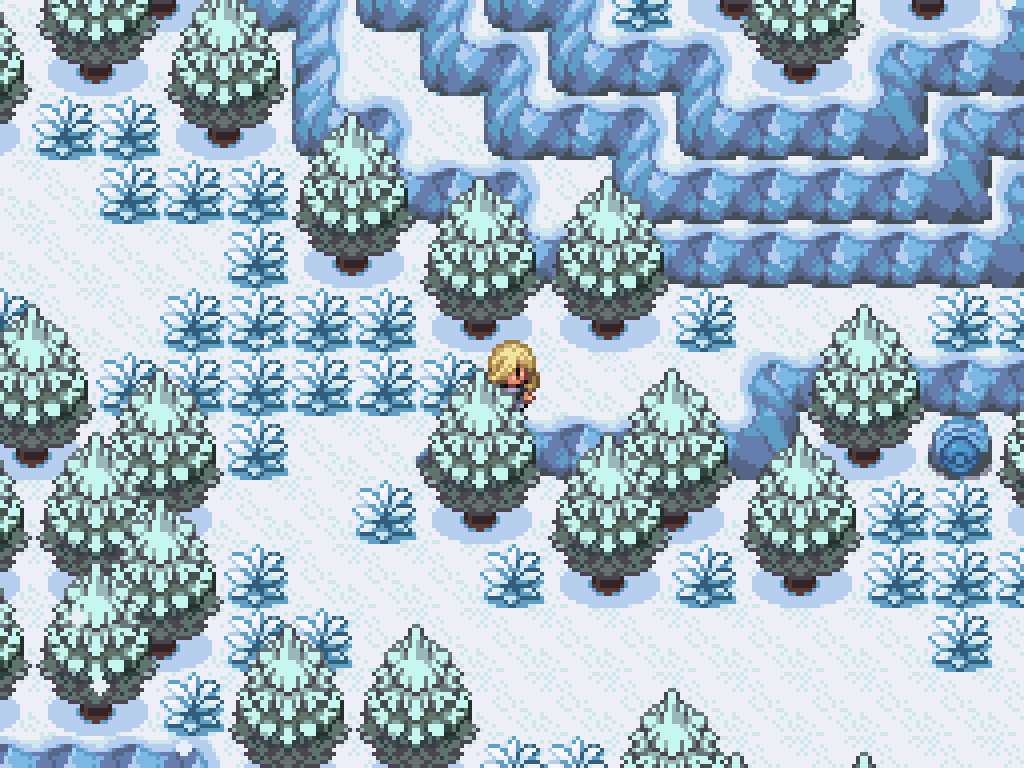
There's a small hidden path here that you can walk along; you'll find the Lucario guarding an egg. Walk back up the mountain until you reach the entrance to Ametrine Mountain 7F. There were some snowy rocks blocking you previously, but they're gone now, so walk along the new path to the south-west until you reach a cave. Fight the Level 85 Lucario, then walk into the cave and pick up the Riolu egg.
With that done, you're done here -- there is quite legitimately nothing to see here until all the way in the postgame (except that mega stone). You can return to the Circus now for your 12th gym battle!
Gen Wunners, Represent!
Have you ever played a Gen 1 game? No? You're not missing out on anything. The games were borderline unplayable until Gen 4, and even then you had to keep a useless sixth Pokémon with, like, Cut around so you can actually move around.
Enter the side room of the circus and talk to Samson for a cutscene, then talk to him again to enter the computer. Welcome to Glitch City. Keep going straight forward (where you will be rudely interrupted by all of the NPCs) until Terra destroys the path in front of you. Unfortunately for her, her corruption left a ladder there, so go straight down it to make it to Mt Moon. There's a bit of corruption here too, so just walk straight left, down, sneak past the NPC, and down again to escape it. (The ladders and NPCs here are completely fake.)
You'll be spat out in Reborn City, back in the Opal Ward. The scientist from the very beginning is still there to the side (which is a nice detail). Walk down past the NPC guarding the stairs and go down the stairs where the exit to Peridot Ward otherwise would be. Now we enter... I'm not really sure. Team Rocket's hideout? Sneak past the NPC guarding the puzzle to access the puzzle (the stairs don't do anything.) This puzzle blows!

Follow the path set out by the red arrow to make it to the exit. (Or turn on walk through walls and walk straight down.) Don't get tricked by the stairs (which will reset you back to the beginning) and go out the door instead; this will put you in Lavender Town (I think?) The only door here that works is the house in the centre of the town. That door will spit you out in a Gen Wun version of the Byxbysion Wasteland; continue upwards and then to the southwest to find an open door. Going through here will have you find... I don't know what this area is.
Activate the dragon statue immediately next to the entrance (who would've found this naturally, seriously?) to open a door to the southeast. There's an NPC guarding your way forward (with a fucking sand veil Sandslash, seriously x2? You've been spared from that); after getting past him, go down the stairs to teleport to the blocked off area and find a Dubious Disc. Go back and exit out of the one-tile-wide door below the NPC to find the fake Citae Astrae. (You can catch more Porygon here!)
Exit out of the bottom to get a small easter-egg (if you found the previous one), and you'll be put on the map that haunts my nightmares. At the top is a door that teleports you to Cerulean Cave (allegedly); the path here is very linear, so just follow it down until you find the Creature. Talk to it to battle a Level 75 Mewtwo. Either kill it naturally or get your Murkrow out of storage and use that to kill it.
Pass through the gates to find a Light Shard, and then open up into the next room to find Terra. Talk to her to start the gym battle. This is one of the easiest gyms in the game, so here's some tips and advice as usual:
- The field effect here is really fucking stupid. It reintroduces the physical/special split screwing over a lot of Pokémon, and the Synthetic Seed forces Pokémon to switch to the QMARKS type which takes neutral damage from all hits. It also makes all Steel, Dark, and Fairy type attacks into Normal type attacks.
- The difficulty of this one is entirely dependent on how many water/ice types you packed. If the answer is "one or more", you will almost definitely win. The only thing with a grass type move is her Palossand, which is also forced to QMARKS type so it doesn't even get STAB.
- The Gen 1 special stat is in effect here, as the field calculates damage based on either the SpAtk or SpDef stat, whichever is higher. This means something like, say... Shuckle suddenly has the highest Special. (Although I can't recommend you use it.) You could also try Florges (with Grass attacks), or Mantine (with Water attacks), or Cryogonal; these have high SpDef and a tolerable speed tier.
- Most of her Pokémon do have an Ice move, so Grass types are a no-go here.
- Her Hippowdon will set up sandstorm, her Palossand will set up sandstorm, her Sandaconda will set up sandstorm, and her Excadrill has Sand Rush. Try overriding the weather with your own weather moves, or run your own Sand Rush mon like Lycanroc.
- Vanilluxe with Snow Warning is an MVP here, ruining the Sand Rush tactic and hitting extremely hard with Aurora Beam. It isn't squishy either, with only one Flamethrower user in Garchomp -- and it dies nearly instantly to Aurora Beam anyway.
- On the contrary, your own Dragon types will probably suck because Dragon was a special type prior to the split. So don't bring any.
- The QMARKS type can really ruin your day, especially when she gets a few Amnesia boosts which stops your special attackers dead and can hit back for extreme damage. Pack a physical attacker to deal with both her Quagsire and Palossand.
- Really, this is a very easy gym because the field effect is so easy to exploit, it just might take a few tries to get into the rhythm of it.
M3G4 T3RR4
| Sprite | Name | Level | Ability | Held Item | Moves | EVs |
|---|---|---|---|---|---|---|
 |
Sandaconda | 75 | Sand Spit | Bug Gem |
|
0/252/102/0/0/154 |
 |
Hippowdon | 75 | Sand Stream | Smooth Rock |
|
0/252/252/0/0/4 |
 |
Excadrill | 75 | Sand Rush | Life Orb |
|
0/4/252/252/0/0 |
 |
Palossand | 75 | Sand Stream | Synthetic Seed |
|
0/252/0/0/252/4 |
 |
Quagsire | 75 | Unaware | Synthetic Seed |
|
0/252/0/0/0/252 |
 |
Garchomp | 75 | Rough Skin | Assault Vest |
|
0/4/0/252/0/0 |
Collect your badge, then exit through both doors to the south to get a cutscene back in the real world with Ciel. Now that you have waterfall, it's time to go clean up the city.