Appendices: Sticker Quests
This is a complete guide to getting every Department Store Sticker. This is the large building in Obsidia Ward which lets you buy a lot of useful items per floor; in order to get access to a floor, you need to get the appropriate sticker for it. These stickers usually require a side quest of some variety, either long or short.
Membership Card
You get the card by simply talking to the attendant on the first floor of the department store.
The first floor sells the basic Pokécentre items, and the second floor sells the status berries and the friendship berries.
Sticker #1: Tangela
This one is nice and easy. Once you've beaten the second PULSE Tangrowth in Jasper Ward, you can enter the second-right building at the very top-left of the ward; the lift (that was previously broken) will carry you to 5F. Talk to the woman within, then return to Peridot Ward and enter this house to the immediate right of the Jasper gate. Talk to the friend inside to get your first sticker.
This floor sells a handful of in-battle effect items, and the weather prolonging items.
Sticker #2: Drifloon
This one is also fairly easy and is available as soon as you have access to Lapis Ward. Enter the house immediately to the right of the Pokécentre there to talk to a panicking mother, who is upset that her son is lost. He can't've gone further than the Beryl Ward... right?
If you go to the Yureyu Power Plant on the other side of the Beryl Bridge, you'll find him being attacked by a Drifloon. Kill it and he will run home... but he gets cornered in the Jasper Ward by a gang of Venipedes, near where you rescued one of the piggies. Kill them and he runs home for real this time; if you return to the home in Lapis and talk to the mother, she'll give you your second sticker.
This floor sells some slightly more useful in-battle effect items, TM48 Round, and the EV increasing battle items.
Sticker #3: Aron
This one is found whilst you're getting the TM for Flash. See the Chapter 7 walkthrough for more information.
This floor sells Great Balls, Full Heals, and the EV Vitamins.
Sticker #4: Meditite
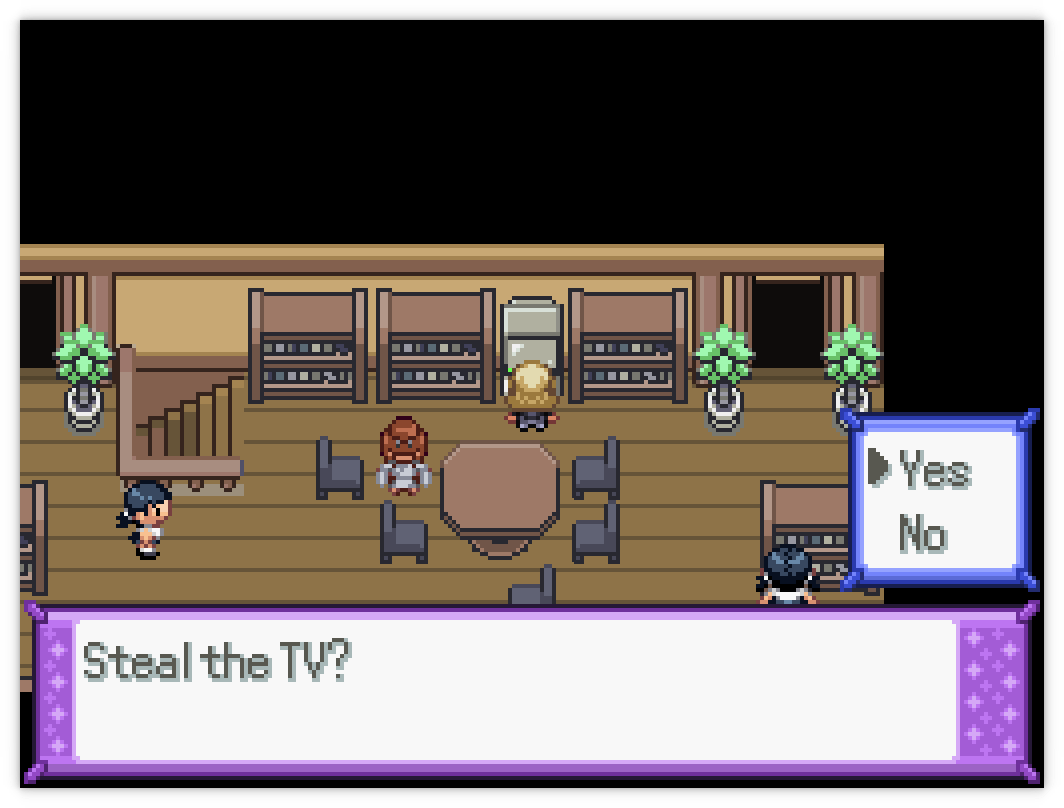
This one is found on Apophyll Island. Inside the inner part of the academy there are a series of stairs on both sides which lead to individual rooms. Go up the stairs at the bottom left and talk to the girl inside; she wants you to bring her a TV.
Your heist target is immediately upstairs; interact with the TV to steal it. Somebody else will try and battle you to stop you; after beating her, you can bring the TV back to the first girl to get your fifth sticker.
This floor sells the anti-type berries.
Sticker #5: Chansey

This is another very easy one. In Spinel Town, talk to the woman immediately below the Pokécentre and she will be teleported away. You can find her in the forest directly above the entrance; give her some Herbal Extract from the Pokécentre and she will give you the next sticker.
This floor sells the Type Gems, which are incredibly useful.
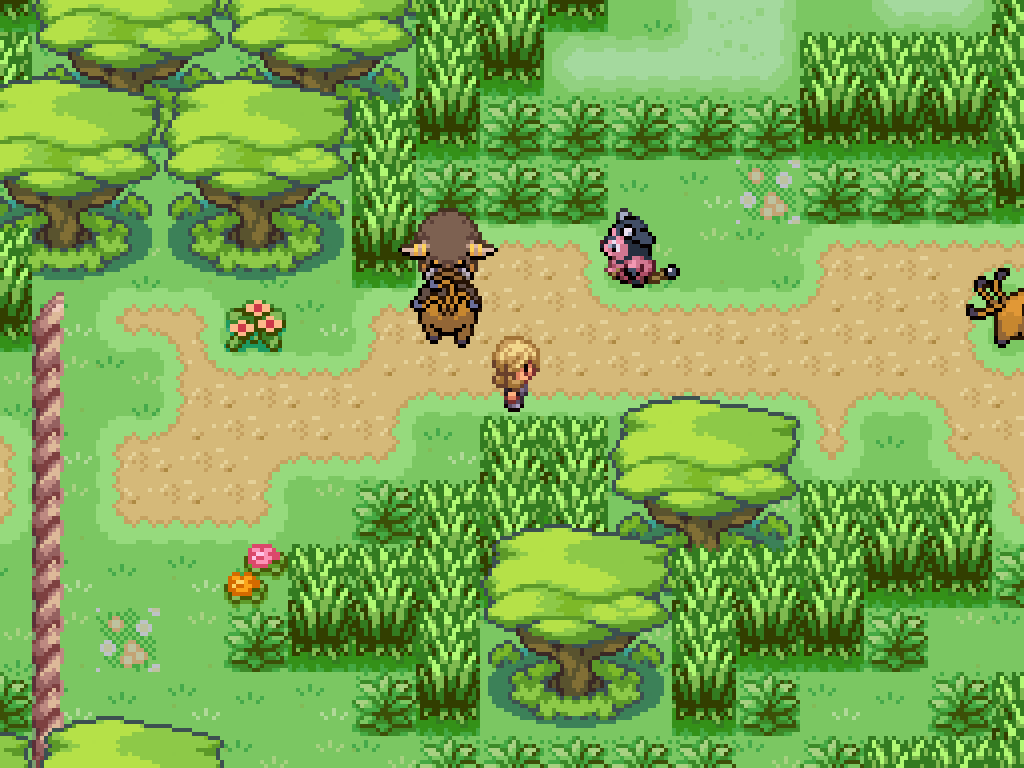
Sticker #6: Heracross
Oh fucking boy. This is one of the handful puzzles Reborn is arguably infamous for, alongside the Route 2 puzzle, the Victory Road minecarts, and maybe some of the worse postgame puzzles. It's actually not as bad as it seems, once you realise the logic behind it, but there are a lot of steps.
FULL Route 1 Heracross Sticker puzzle solution
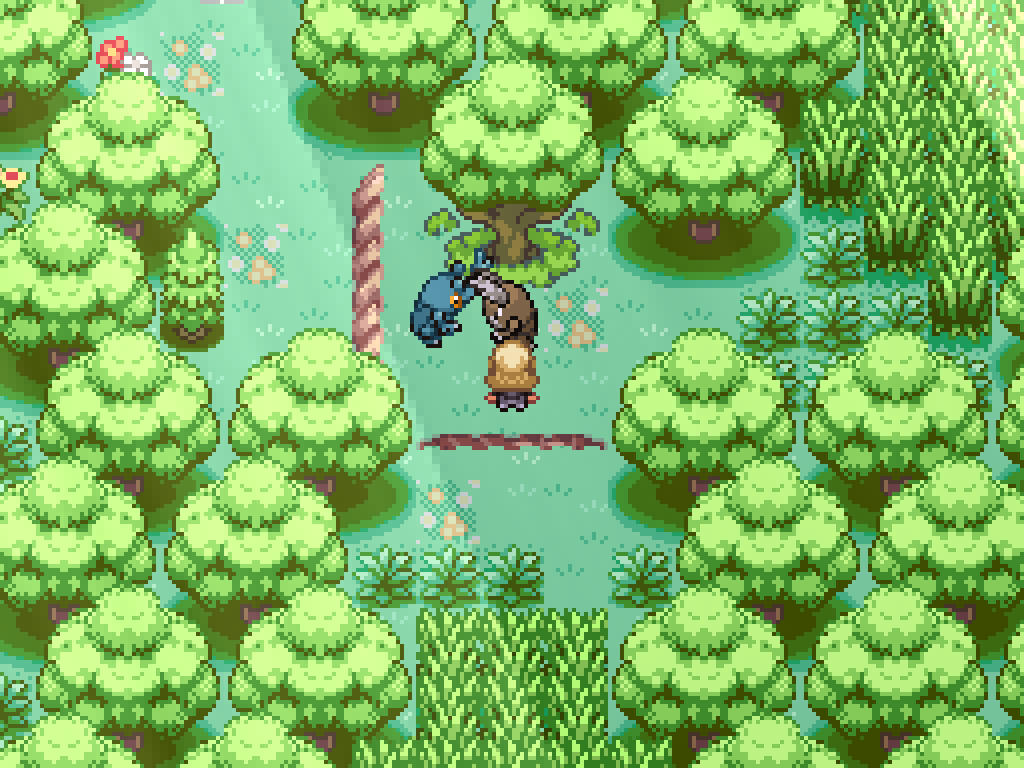
The way this works is fairly simple. There are four elements available to you, each with a specific function. Pinsir and Heracross pairs can be summoned by activating honey trees with honey in your inventory -- available from the flower shop in Lapis Ward, or by event along Route 1 -- and Bouffalant and Tauros pairs are available all across Route 1. You need to kill the opposite Pokémon to the one you want to use.
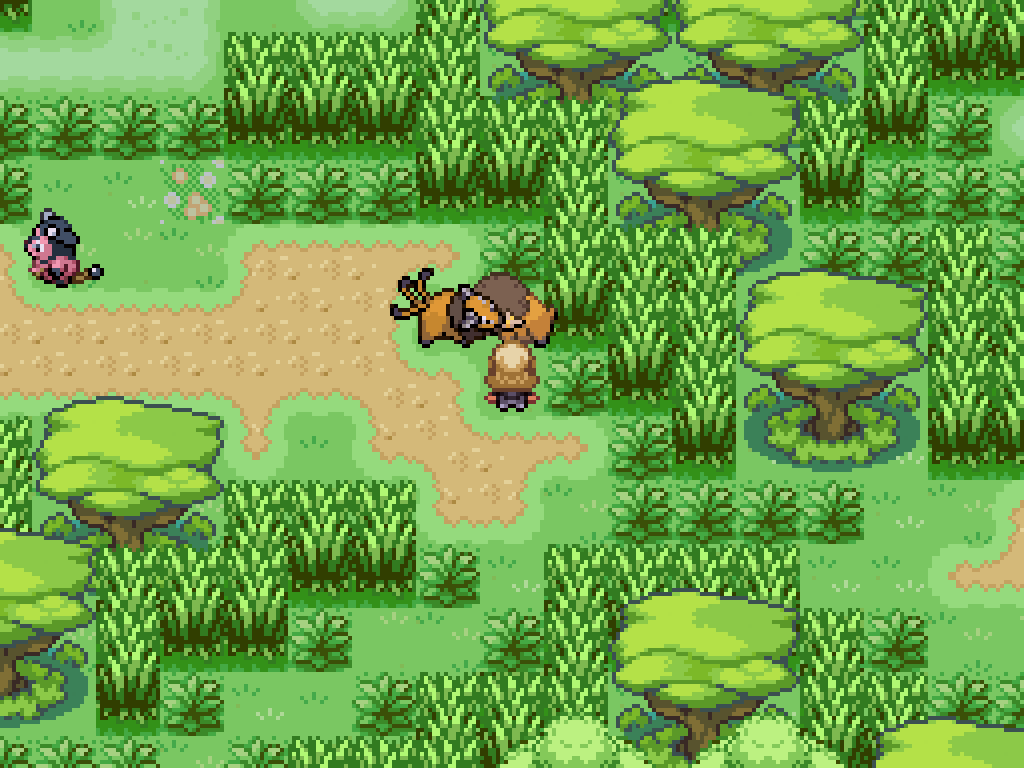
- Bouffalant can be used to push logs away, even across rooms.
- Tauros can be used to hop up ledges.
- Pinsir can destroy nearby logs.
- Heracross can destroy nearby spider webs.
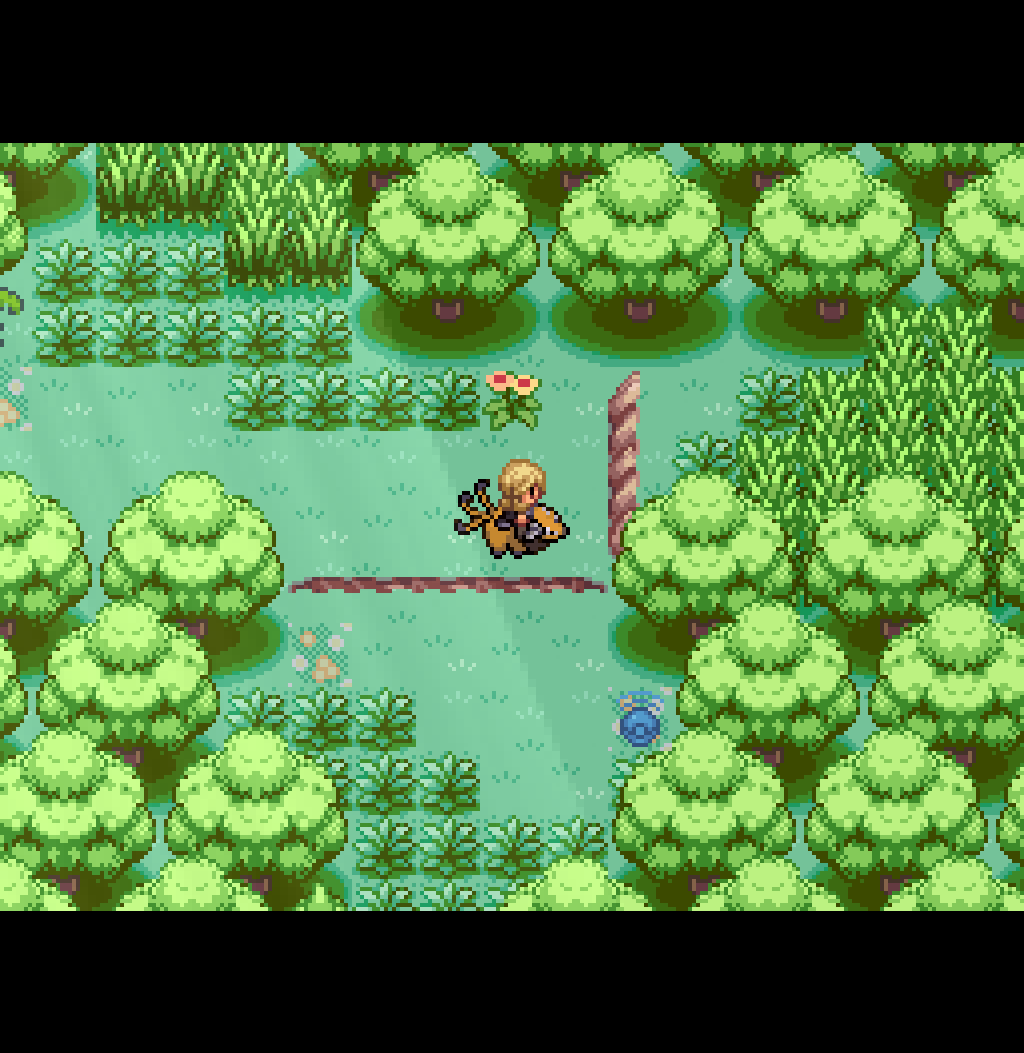
The item you need to get the sticker is fairly far away, so you're going to need to build a route all the way there. There's no downside to either pushing logs away, nor destroying them or destroying spiderwebs, so this is very difficult to mess up. We'll work our way from the very left, naming the left-most entrance to South Aventurine Woods as the first exit, and the right-most entrance as the eighth exit.
At any point you can reset all of the Tauros/Bouffalant pairs by stepping on one of the moving flowers found within the woods, which will make you "fall asleep" and reset the Route 1 map.
We'll start with the first exit. Kill the Tauros here to let Bouffalant move a log further down within the woods.

Before going into the first exit, kill the Bouffalant immediately next to the pair you just battled in order to ride the Tauros, then ride it down into the first exit. Use it to jump up this ledge, then dismount it.
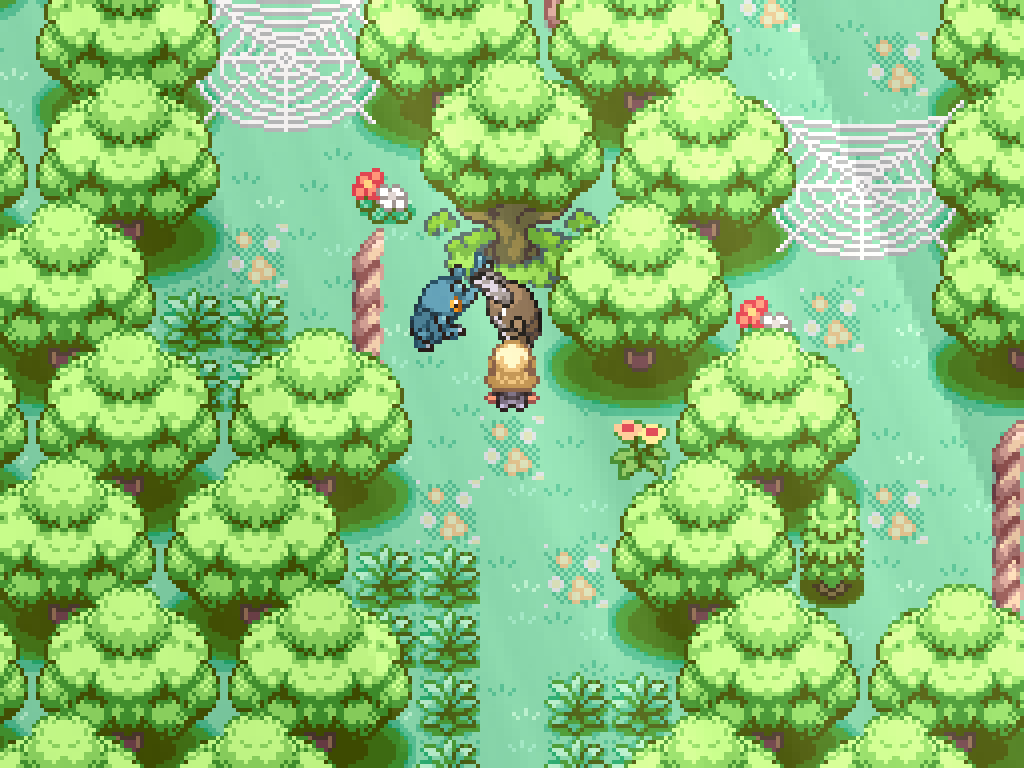
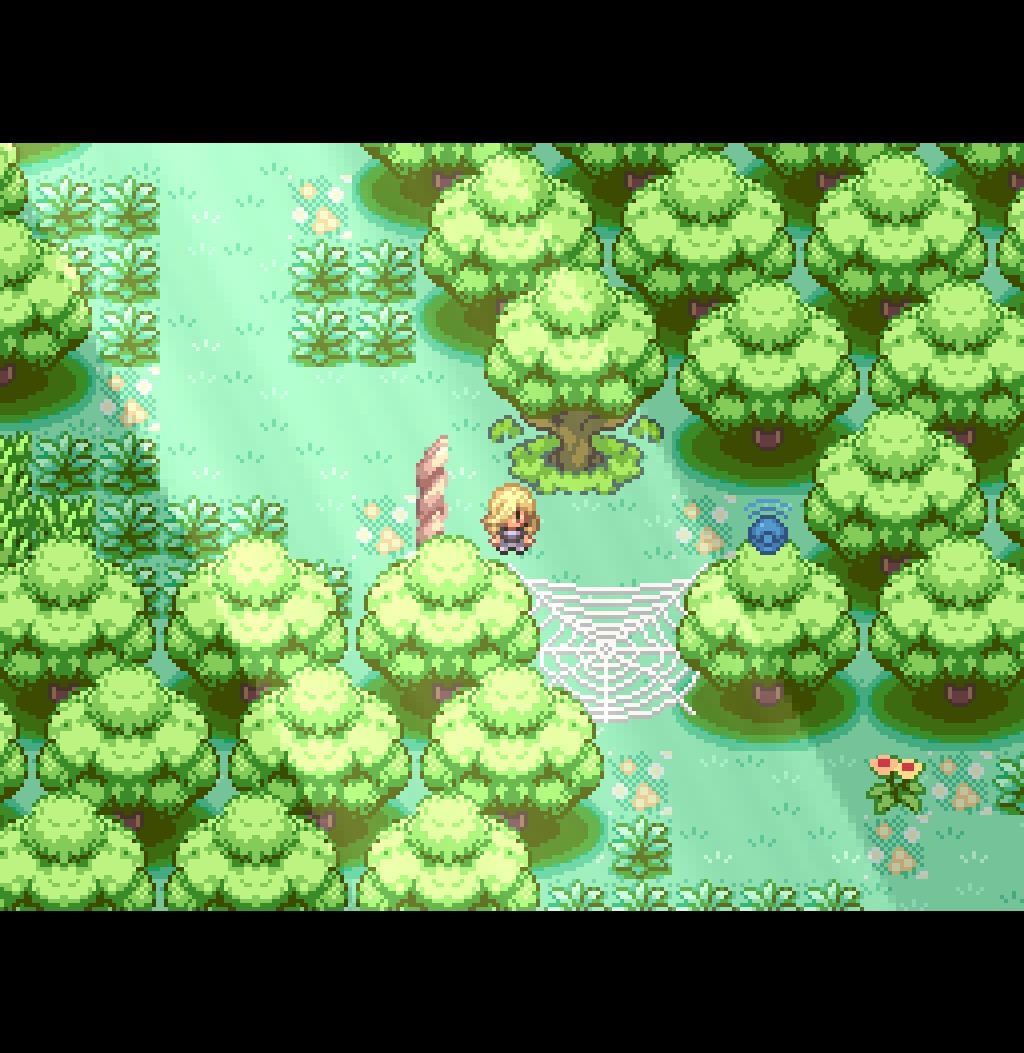
If you interact with this honey tree, you can use a single honey item to spawn a bug pair. Kill the Pinsir to have Heracross destroy the spiderweb. This opens the path from the second exit. Step on one of the flowers to reset Route 1.
Once back on Route 1, kill this Bouffalant to ride the Tauros. Enter the second exit to the southern woods.
The path you just opened unfortunately leads to a dead-end currently; instead, use the Tauros to jump up this ledge, then dismount before the tall grass.
Slather honey on this tree to spawn a bug pair. Kill the Pinsir to have Heracross destroy the spiderweb. There is a flower hidden slightly to the left; step on it to reset Route 1.
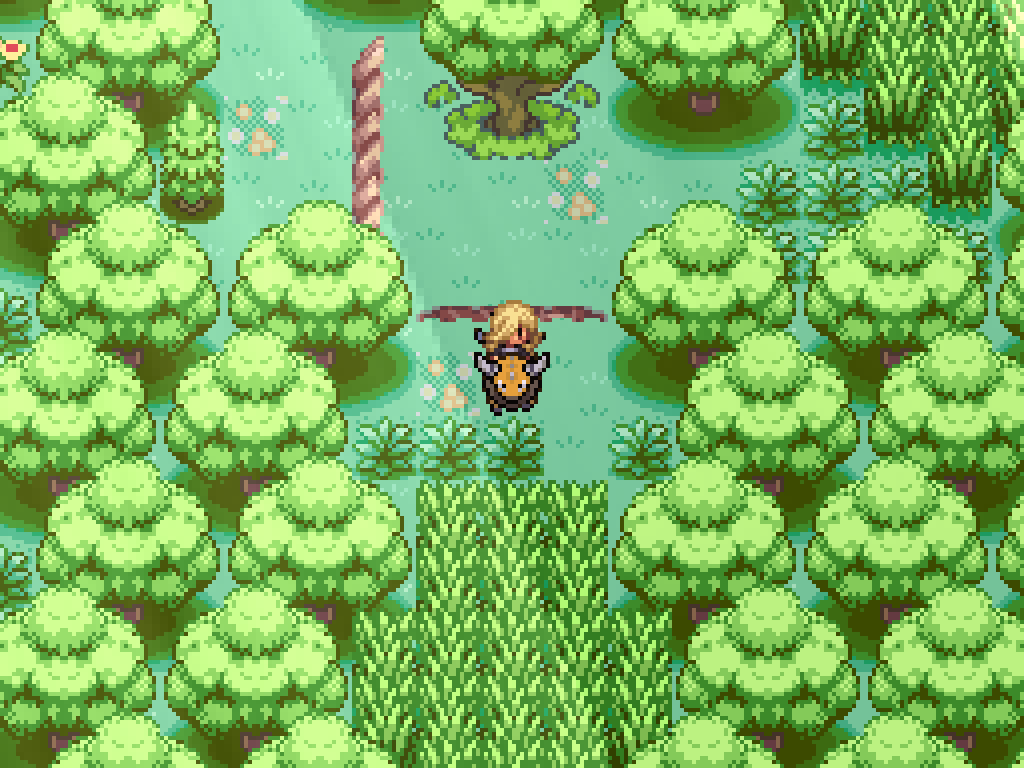
With that spiderweb gone, you can ride a Tauros back into the second exit, back up the ledge from the previous step, and past the new route up this ledge. Dismount it in front of the tall grass.
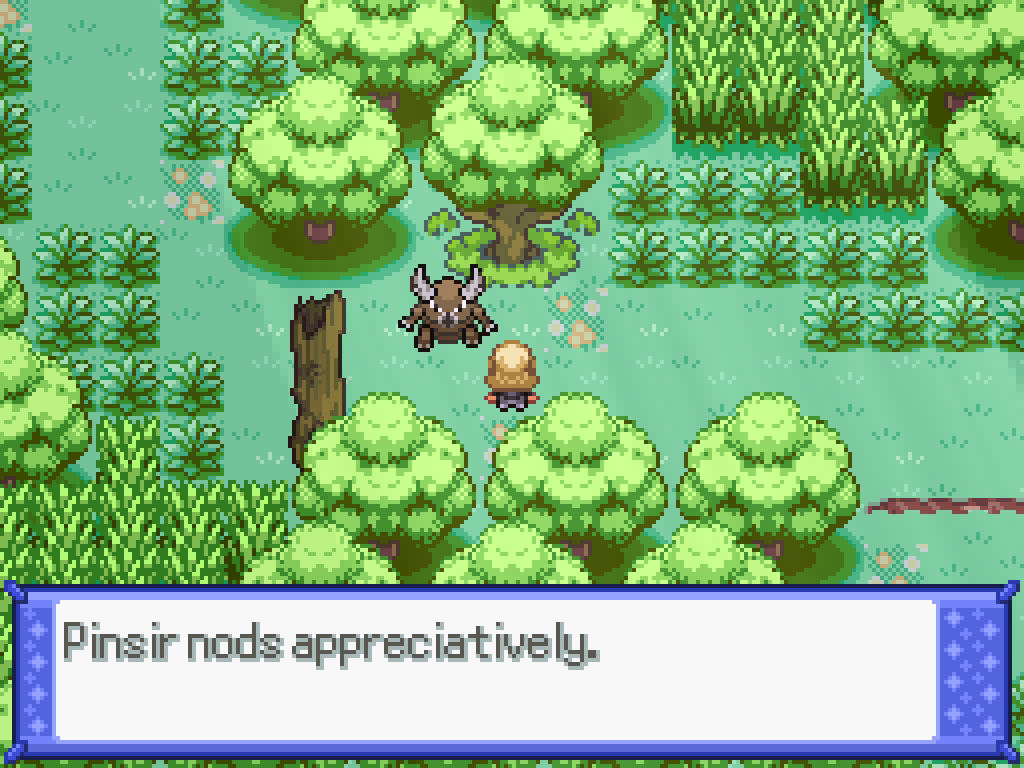
Slather honey on this tree to spawn a bug pair. Kill the Heracross to have Pinsir destroy the log; this does open up a route for a Tauros but it doesn't lead anywhere just yet. Instead, step on the flowers to reset Route 1.
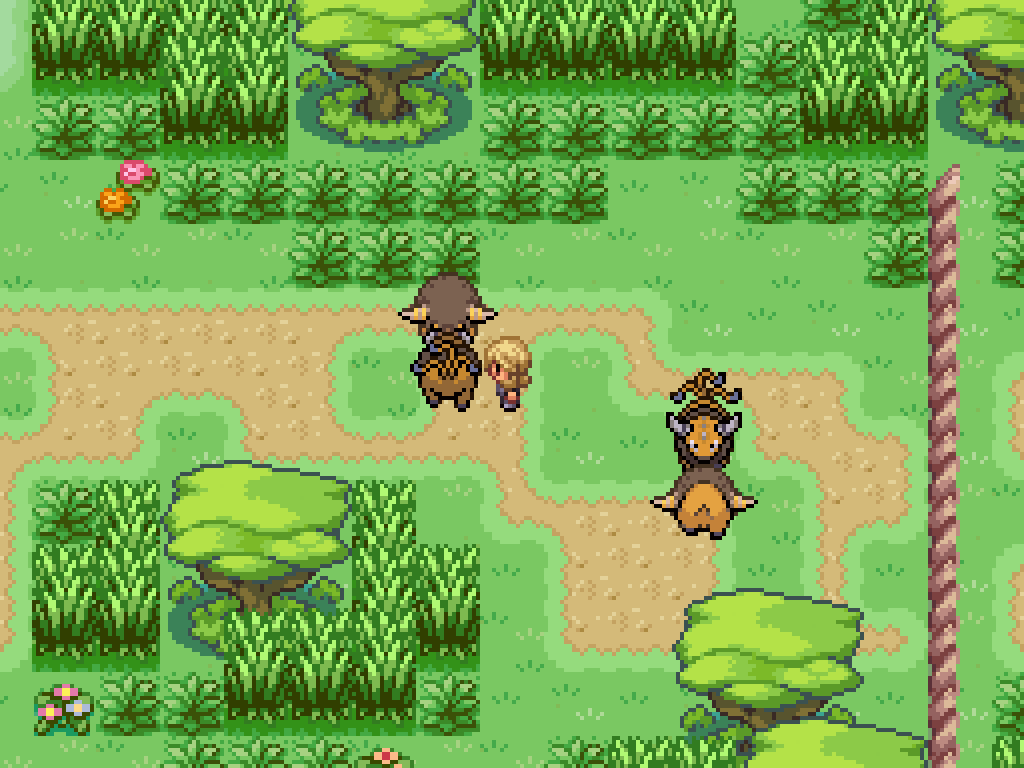
Above the third exit to the southern woods is two pairs of fighting Pokémon. First, kill this Tauros to have Bouffalant move a log. Ignore the other pair for now and return to the pair above the second exit.
The path you previously made by breaking the spider webs will lead to a fork; the bottom ledge leads to a single Link Cable and a berry tree. You can plant your own berries if you so desire, too. The right path is the right path; dismount the Tauros in front of the tall grass.
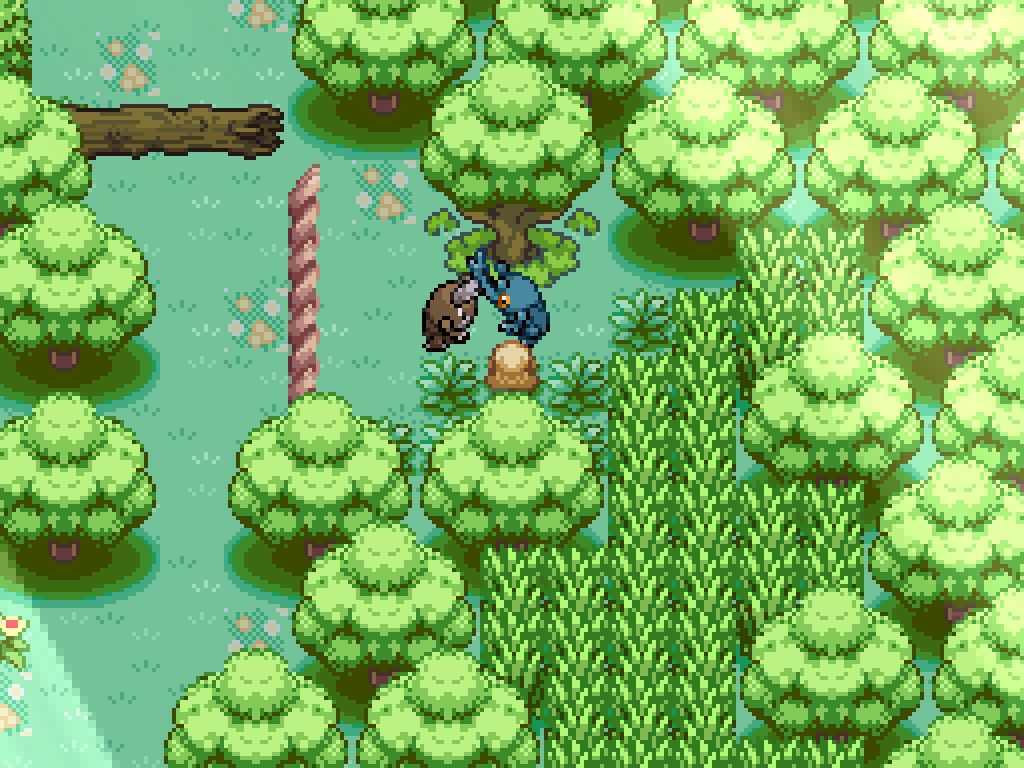
Slather honey on this tree to spawn a bug pair. Kill the Heracross to have Pinsir destroy the log, then return to the Route 1 pair that you previously ignored.
Ride the Tauros through the third exit, up to this ledge; dismount it and spawn a bug pair using the honey tree. Kill Pinsir to have Heracross destroy the web; this opens up a small path that you can't traverse. Return to Route 1.
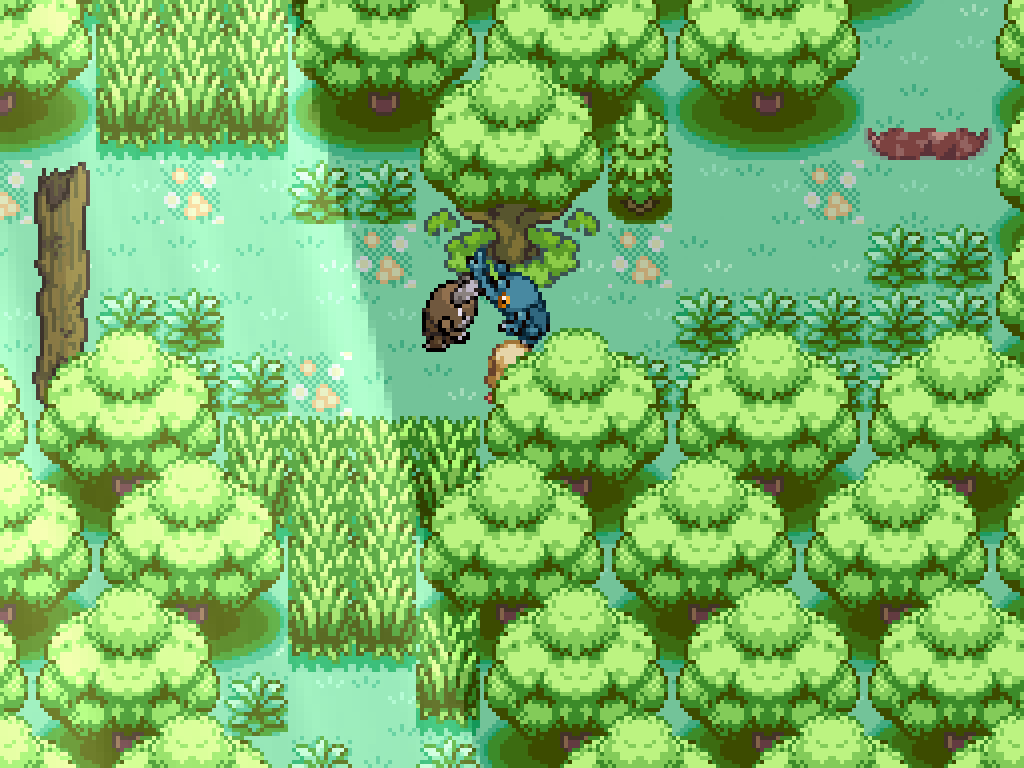
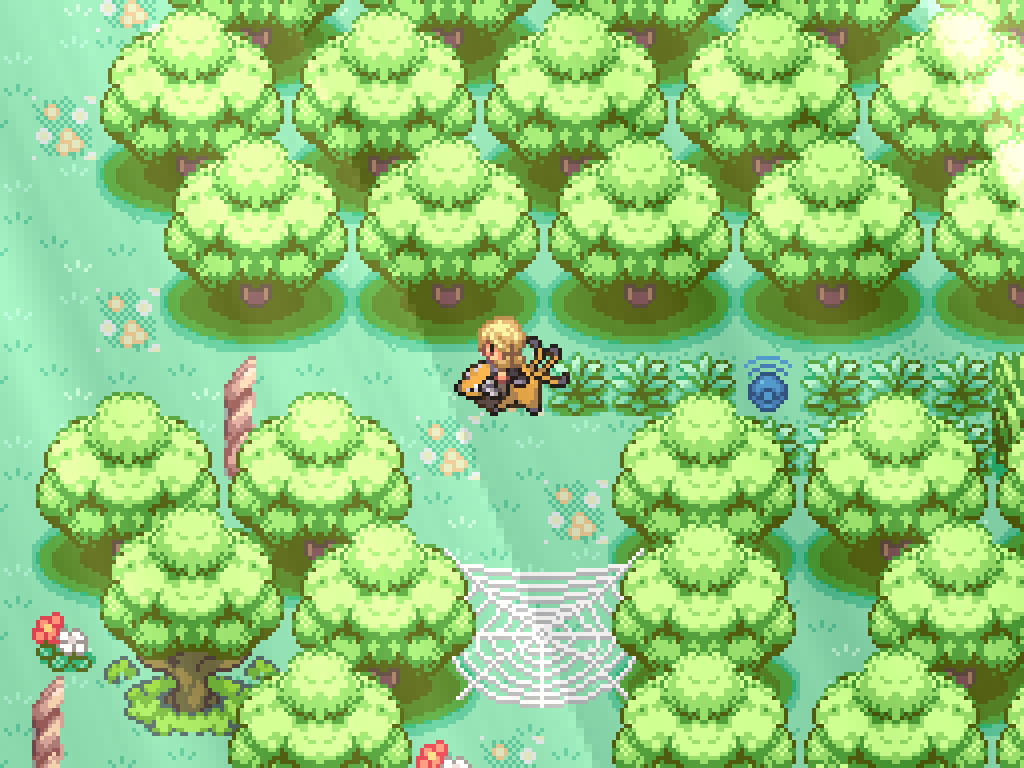
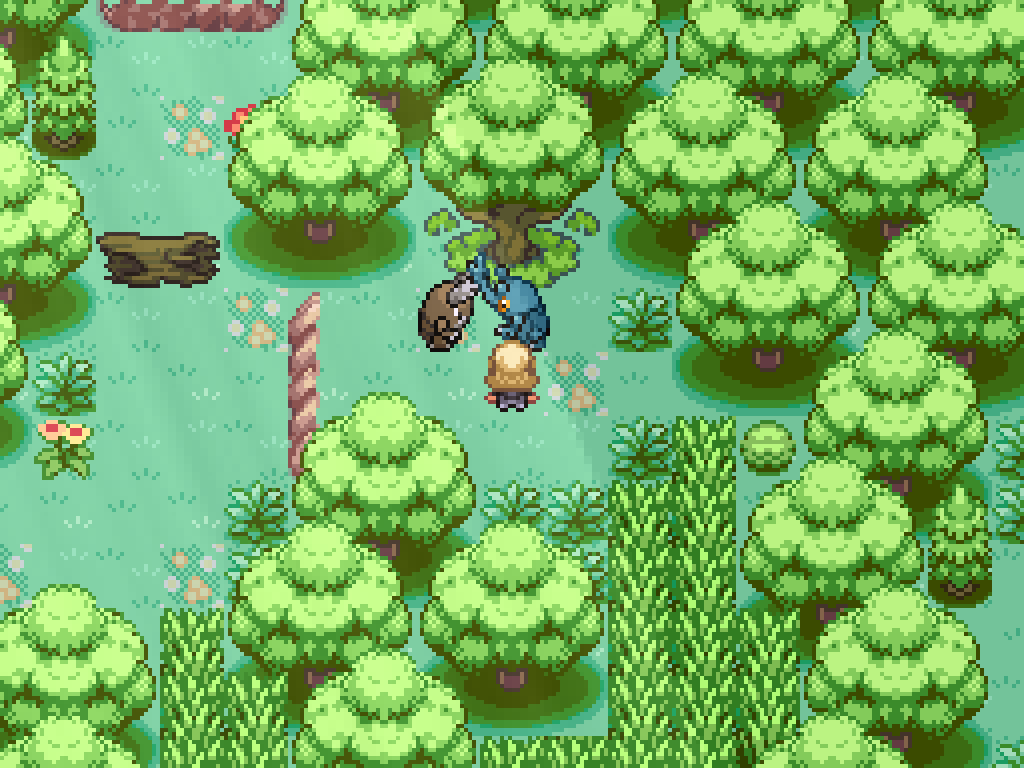
Walk through the fourth exit, and through the tall grass to this tree (it's by the exit from Tanzan Mountain). Slather honey on it, then kill Heracross to have Pinsir destroy the log.
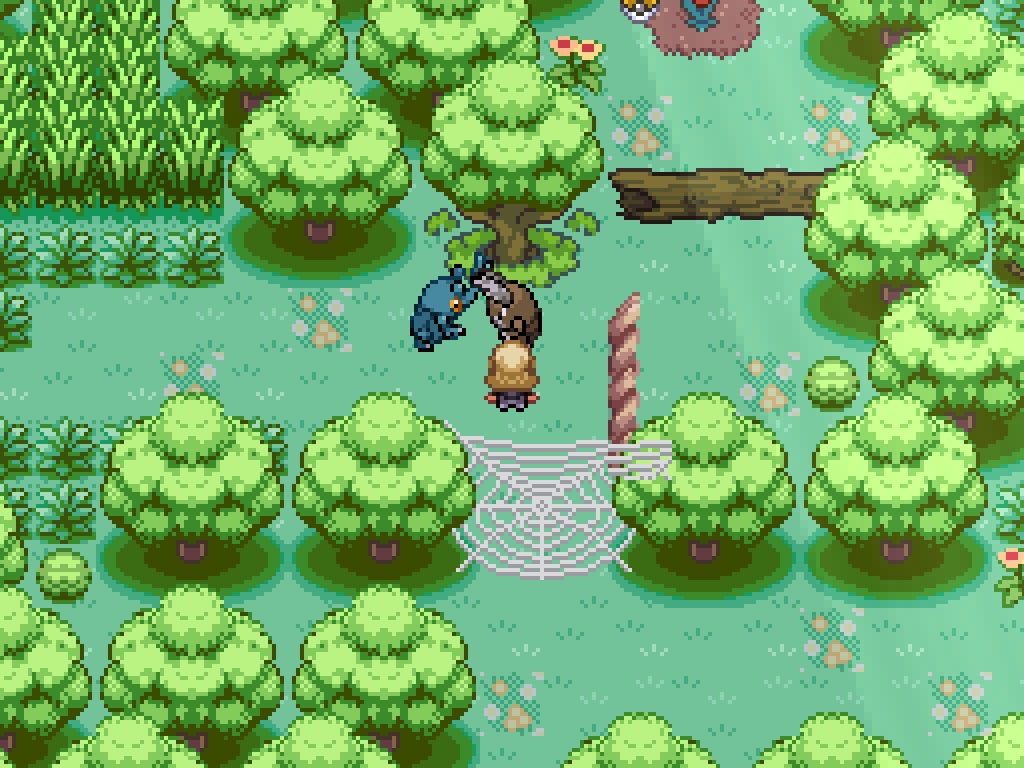
Walk down through the Tall Grass and slather honey on this tree twice; kill both bugs to both destroy the spiderweb and the log.
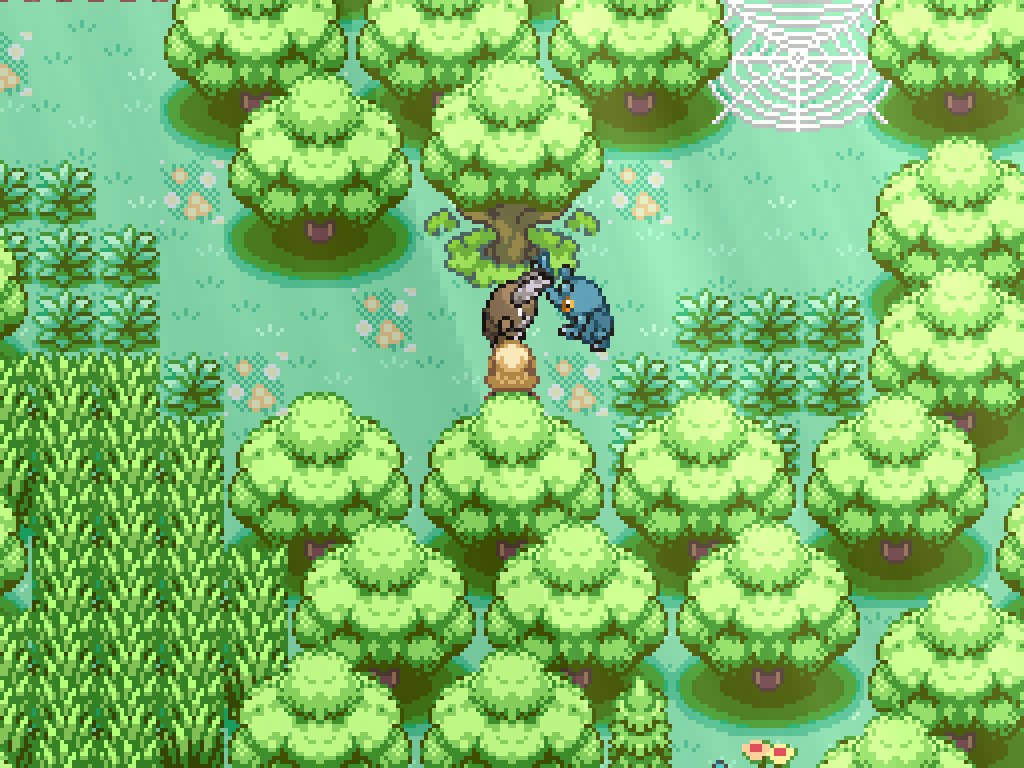
Walk past the spider web and to through the grass to this honey tree, and spawn a bug pair. Kill Heracross to have Pinsir destroy the log. Almost done!
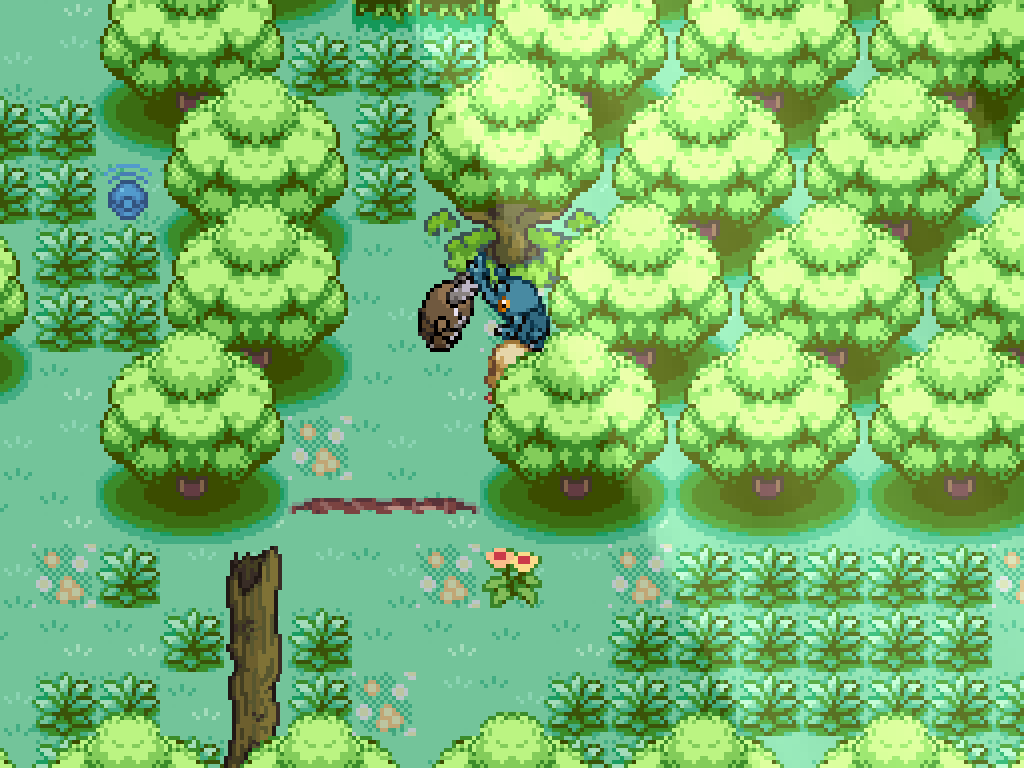
Near the 4th exit, spawn the bug pair with this tree and then kill Pinsir to have Heracross destroy the spider web. Walk down and exit through the fifth exit, then travel upwards and kill the Tauros to have Bouffalant move the log below. With the log gone, you can walk from the fourth to the area above the ledge from the fifth exit (or, use a Tauros) and then up through the tall grass.
Spawn the bug pair using this tree, and then kill Heracross to have Pinsir destroy the log.

Finally, you can enter the third entrance whilst riding a Tauros, and then follow the ledges until you make it here. Pick up TM51 Steel Wing on the way, then pick up the Tech Glasses and return to the Nature Centre to give that stupid fucking binoclard his glasses back. I hope it was worth it.